My CodeLite and SDL2 setup
2015.08.30.

Introduction
A while back I switched from CodeBlocks to CodeLite, which made setting up my programming environment a bit more complicated. While CodeBlocks came with a compiler and I could get an easy to install SDL1.2 package and even a project template from my first semester programming subject's website, I couldn't use the same in my new IDE. I spent some time figuring out how to get everything I needed set up: a compiler with C++11 and regular expression support, a working debugger, and the ability to compile SDL2. Here's how you can set it up too. Be warned: it's a long read.
With the school year starting soon, I figured this was a good time to do a clean install of Windows 10. I only installed Windows updates and a couple things from Ninite, so everything you need to get this setup working will be in the steps below.
A note on the images
I decided that having every image open full size in a new tab on click would've been inconvenient and cause too many accidental triggers of that behaviour, so if something is too small, you'll have to use Right click -> Open image in new tab. The image sizes should be fine on desktop though.
Installing CodeLite and Mingw-w64
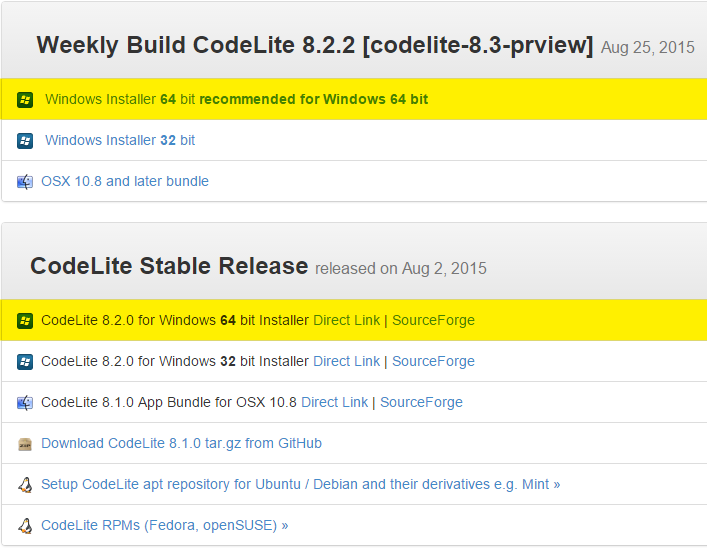
Getting CodeLite is fairly straightforward, go to their download page and get the stable 64 bit version (or the weekly, if you're feeling adventurous). The CodeLite installer doesn't really have any options, so just click through that.
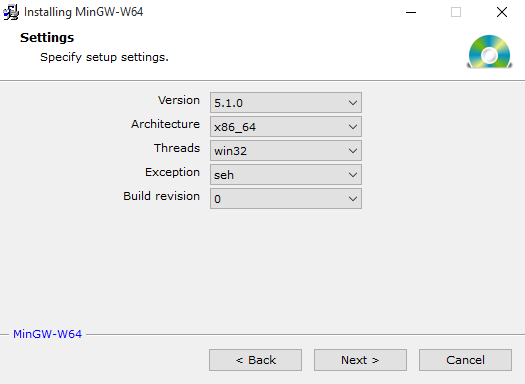
The compiler I use is Mingw-w64, which you can get here. Choose the Mingw-builds version, you'll be redirected to a SourceForge download. This installer is a bit more complicated, here are the options that I use:
- Version: 5.1.0
- Architecture: x86_64
- Threads: win32
- Exception: seh
- Build revision: 0
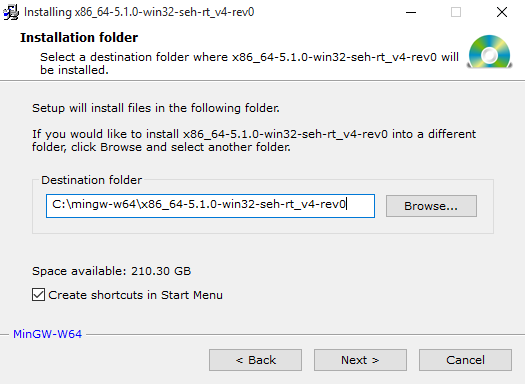
By default, it installs under Program Files, but I like having the compiler in the root directory of my drive. If you choose something different, you'll have to pay attention and change some paths later on.
CodeLite projects
I have an SDL2 project template for CodeLite that you can use, it contains a small example program as well as the SDL2 gfx library which makes drawing simple things on the screen a lot easier. It also links all 3 SDL libraries (you won't need them all most of the time), and has C++11 enabled by default.
I also have a slightly modified g++ executable template that has a C++ Hello World program instead of the C style one that CodeLite has by default (for some reason). You can download them both here.
To install them, copy their folders to C:\Program Files\CodeLite\templates\projects (or the equivalent folder, if you've installed it somewhere else).
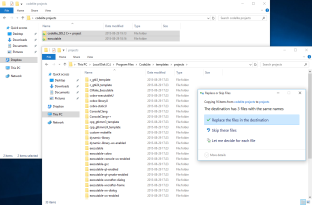
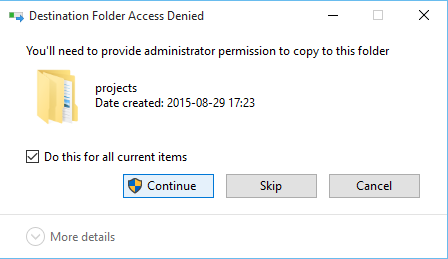
You might be prompted to give permission to copy into the folder (if it's in Program Files), click Continue.
Adding the compiler to Path
The easiest way to be able to use the executables and dll's that come with the compiler from anywhere is to add the compiler's bin folder to your Path environment variable.
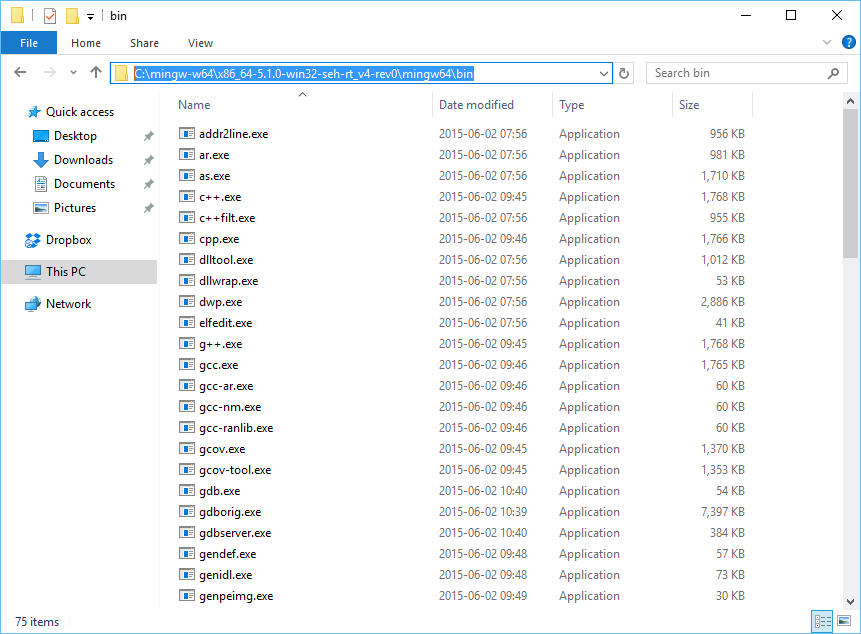
Go to your compiler's installation directory, and copy the path of its bin folder. If you installed it as I did, that's gonna be something like C:\mingw-w64\x86_64-5.1.0-win32-seh-rt_v4-rev0\mingw64\bin - you should see files like g++.exe in this folder.
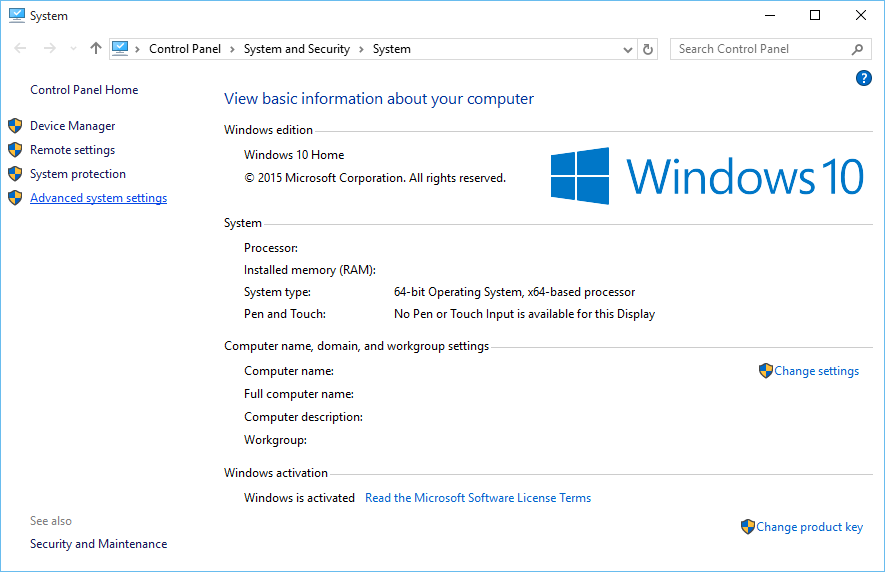
Press Windows+Pause/Break on your keyboard to open the System menu of the Control Panel (you can also do this by searching the start menu for "System"). Click Advanced system settings on the left.
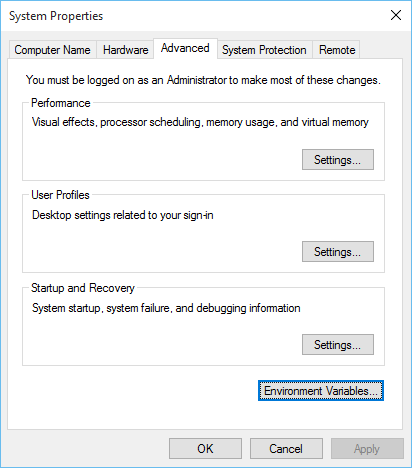
Under the Advanced tab, click Environment Variables.
Look for the one named Path, and click Edit.
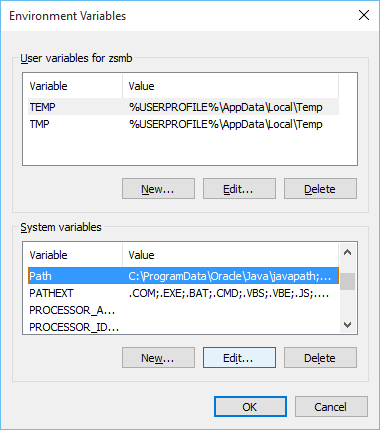
Paste the path you copied earlier to the beginning of all the text that's already in the Variable value field, then add a semicolon after it to separate it from the rest.


Close all the windows you've opened by clicking OK on each.
CodeLite wizard
Now you're ready to launch CodeLite.
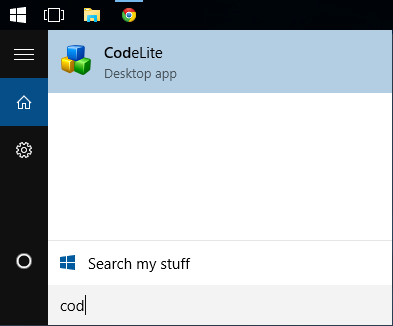
You'll be presented with a setup wizard on the first run. You can choose which plugins you want on the second page of the wizard, I usually keep all of them enabled.
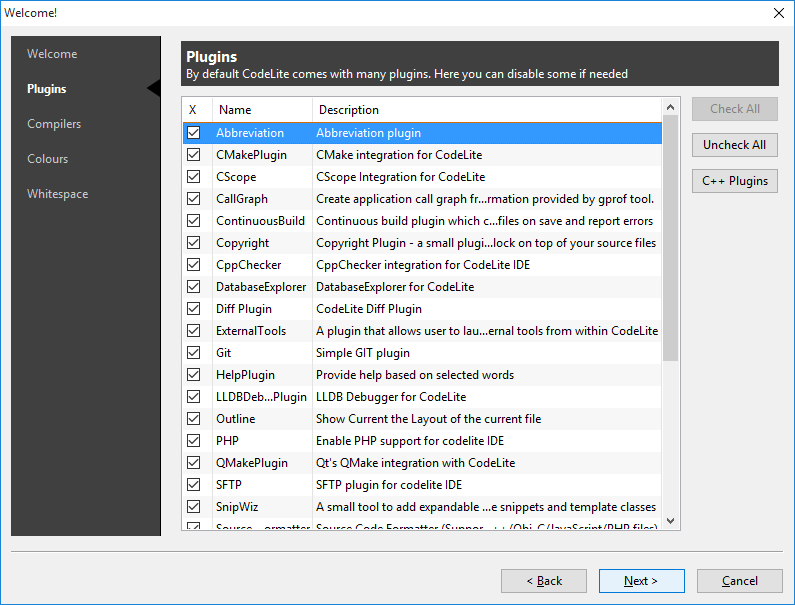
On the next page, click Scan for installed compilers, it should detect mingw64 automatically.
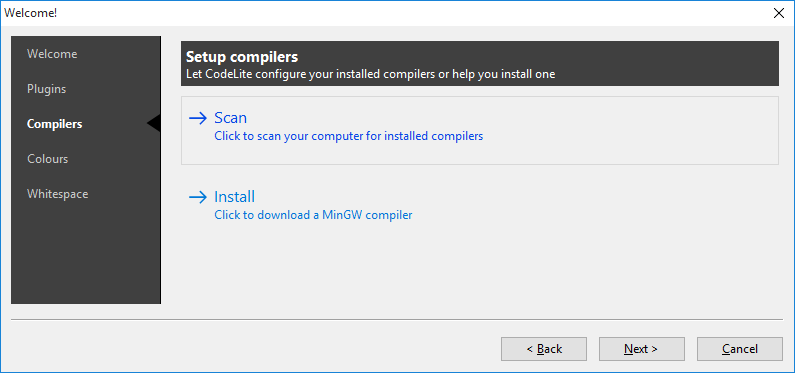
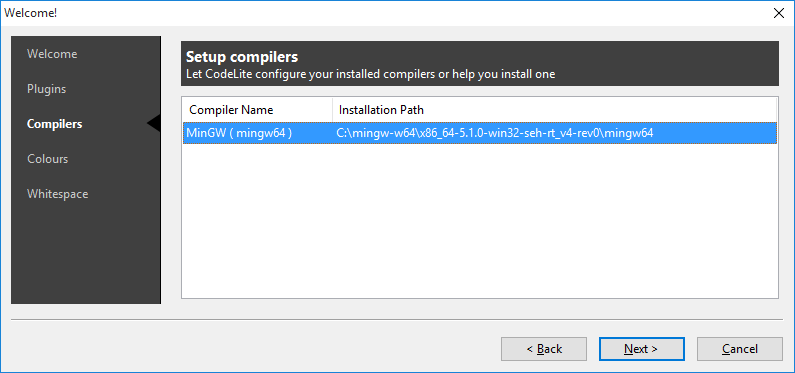
On the last two pages, set the colour options to your liking (I'll get to that later), as well as the whitespace settings.
Workspace
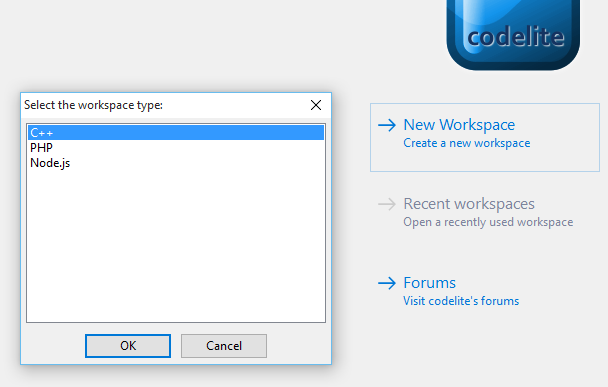
Click New Workspace on the welcome screen that you arrived at, and select C++ from the list of languages.
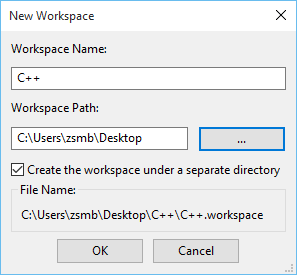
Choose a name and path for the workspace - for the purposes of this tutorial, I just created one on my Desktop.
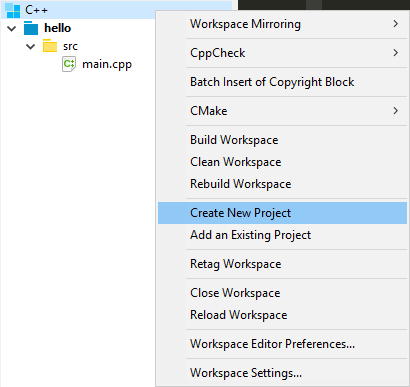
Right click the workspace in the pane on the left, and then select Create New Project.
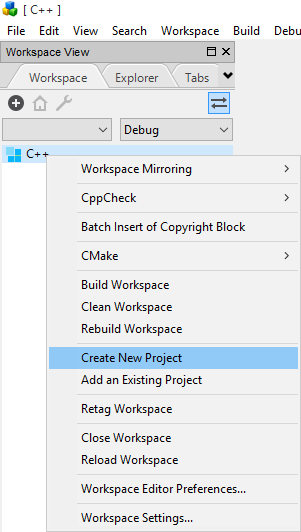
Hello world
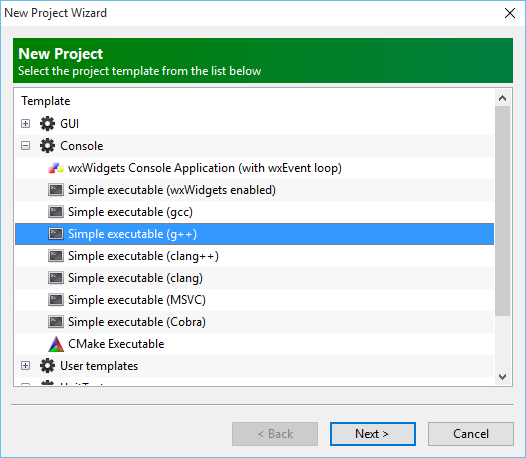
Under the Console category, select Simple executable (g++).
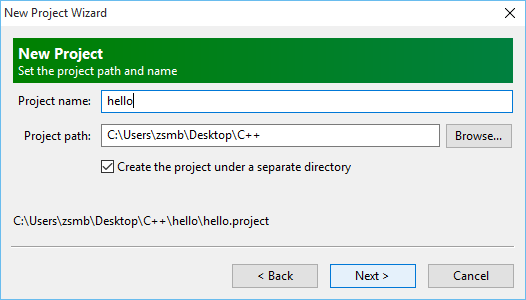
Give the project any name you want.
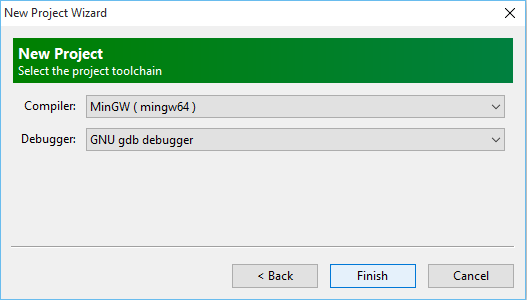
The Compiler and Debugger should both be set by default.
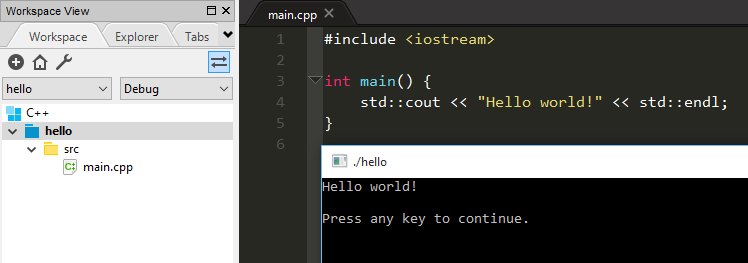
In the pane on the left, open the project by toggling the arrows, then open the src folder inside. Double clicking the main.cpp file will open it in the editor.

You can build and run your selected project (indicated by bold letters in your workspace) by pressing Ctrl+F9, or from the menu under Build -> Build and Run Project.
Getting SDL2
If all that ran fine, you can move on to getting SDL. You'll want to get the mingw Development Libraries of all of the SDL libraries.
- SDL2 the core components of the library
- SDL2_image for using image files
- SDL2_mixer for using audio
- SDL2_ttf to render fonts
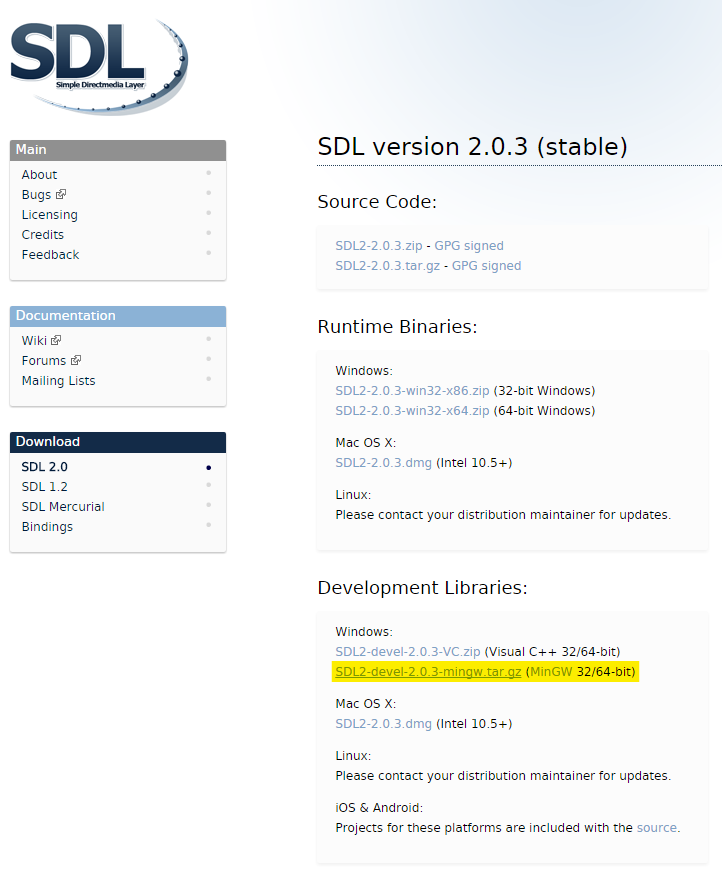
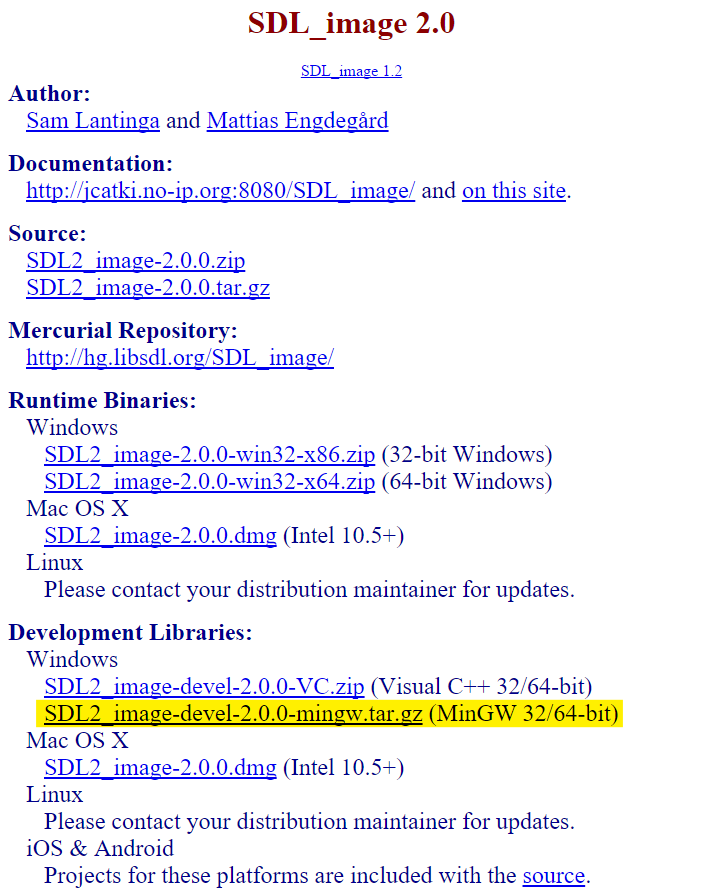
Here's what the SDL_image site looks like, the last 2 have identical layouts to it.
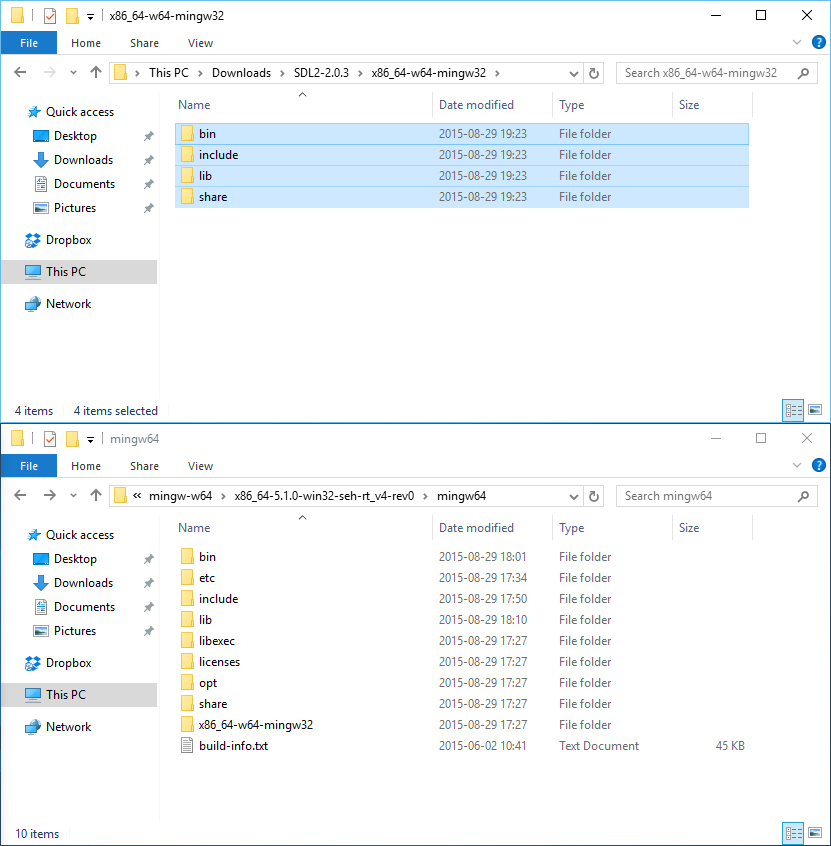
The downloaded archives will have a x86_64(...) folder inside, you'll have to copy the contents of those folders (bin, include, lib, share) into your compiler's root directory, which is C:\mingw-w64\x86_64-5.1.0-win32-seh-rt_v4-rev0\mingw64 if you chose the same installation path as I did.
Hello SDL2
If you still have CodeLite running after the hello world example, you might have to restart it at this point for it to pick up all the new files.
Create a new project, name it whatever you want, and then under the GUI category, select the SDL2 C++ project (which should be here if you copied the template to the right directory).
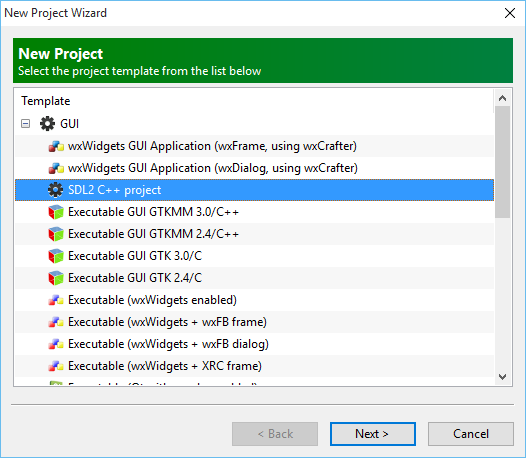
The compiler should be selected by default again, click Finish to create the project.

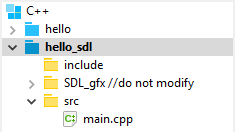
Inside the project you'll find a SDL_gfx folder, which you should not touch unless you know what you're doing. You can double click main.cpp in the src folder to view the code of the sample SDL project.
You can make this project active by double clicking its name in the workspace (if you forget to select it, it'll compile your previous project in the next step).
Now you should be ready to compile and run it, so press Ctrl+F9. If the circles appear, you have successfully set up everything.
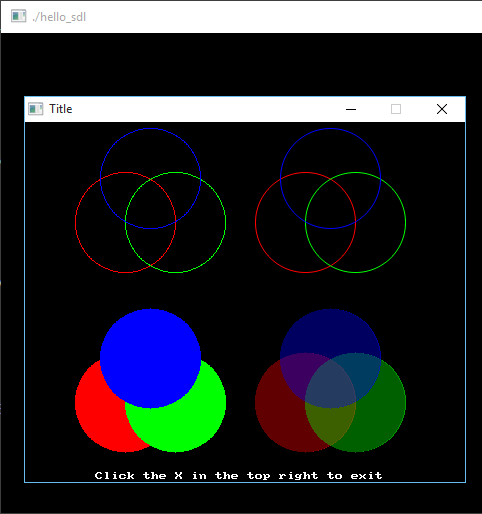
Note that if you have a different install path for your compiler, you'll have to go into the project settings (right click on the project, Settings), and modify the paths you see under the Compiler and Linker menus accordingly before you can compile the project.
A common SDL2 bug
If you're getting an error that has something to do with "winapifamily.h" when trying to compile, check out this thread for the solution (you have to download a file and put it in your SDL installation directory).
Break
At this point, your installation and setup is basically complete, so you can stop reading here. In the following I'll show you how my syntax highlighting is set up and some additional tests (debugger, regular expressions, C++11 features) that I run for myself, but those aren't exactly necessary.
Theme
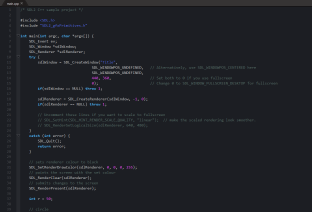
I use a theme that's no longer available in CodeLite and I also slightly modified it to my taste. You can download it below, and here's how you can set it up.
| Name | Description | Size | Date | |
|---|---|---|---|---|
| codelite_themes.zip | A pack of CodeLite themes | 152 KB | 2015.08.30. |
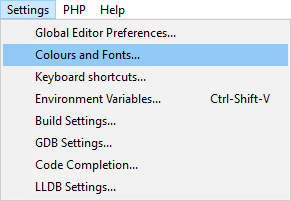
Go to Settings -> Colours and Fonts.
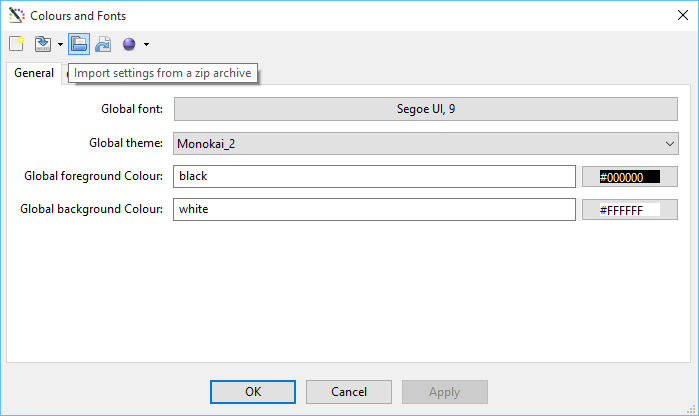
Click the Import settings icon (third one on the top), and browse for the downloaded zip file.
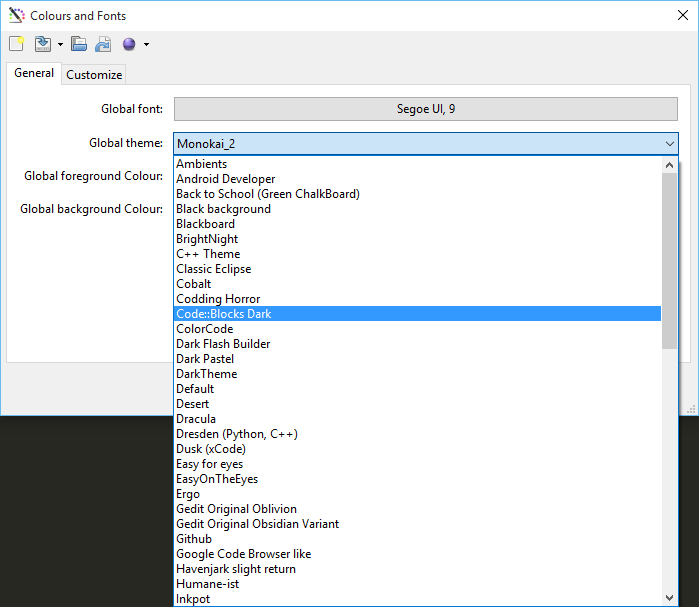
For the Global theme setting, choose Code::Blocks Dark, which should now be in the list.
That's it, you're done!
Hello debugger
I used to do this test to check if my debugger's working (CodeLite and my previous compiler had some issues with its path settings), but since I use Mingw-w64 this is just an extra test.
Create a new project, choose Console -> Simple executable (g++).

Open main.cpp and copy this code into it.
#include <iostream>

int main() {
	std::cout << "Hello, world!" << std::endl;

    int a = 0;
    int b = 5;
    int* p = NULL;

    int c = a + 3*b + (*p);

    std::cout << 2*c << std::endl;

    return 0;
}
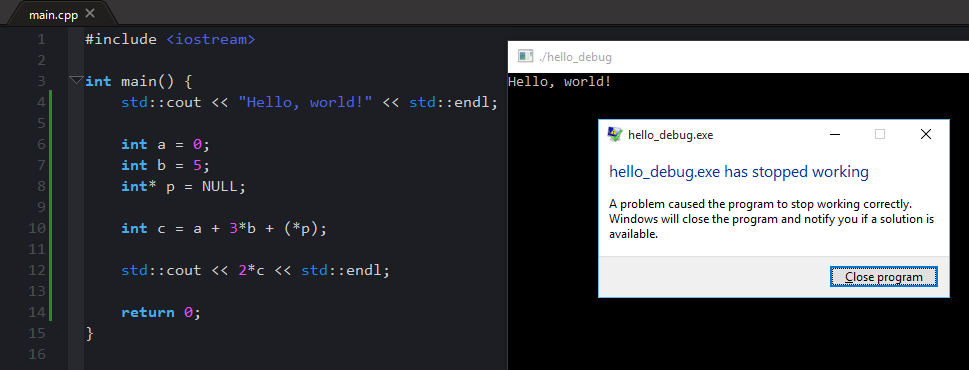
If you run this (Ctrl+F9), it should crash, since you're trying to dereference a NULL pointer on line 10.
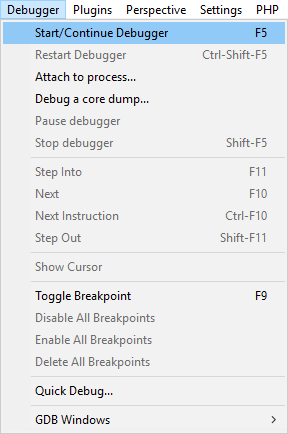
To start the debugger, press F5 or select Debugger -> Start/Continue Debugger from the menu.
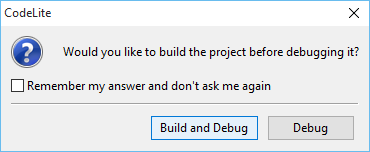
In the popup window that appears, choose Build and Debug.
The debugger should find the segmentation fault.
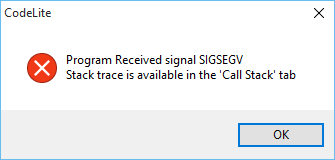
It will show you the line where the crash occurred, and you can look at information like the call stack or the current values of local variables in the Debugger pane.

Hello regex
Regular expressions are still a bit new to GCC (on Linux, I still have to compile them with g++-4.9 instead of just g++), thankfully Mingw-w64 has them implemented already.
Create a new g++ executable, and open the project settings. In the Compiler section, add ";‑std=c++11" to the C++ Compiler Options that are already there. (This flag is added in the SDL2 project by default.)
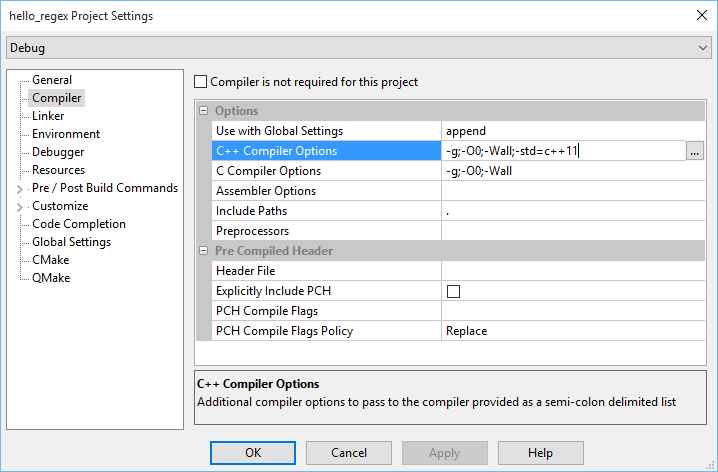
Here's the example code that I use for testing:
#include <iostream>
#include <string>
#include <regex>

void test(std::string str) {
    std::regex exp("^a.*");

    if(regex_match(str, exp)) {
        std::cout << "Matched!" << std::endl;
    }
    else {
        std::cout << "Not matched!" << std::endl;
    }
}

int main() {
	std::string strings[] = {"abc", "dfe", "asd", "fgh"};

    for(auto str : strings) {
        test(str);
    }
}
The regular expression "^a.*" matches any string that starts with an "a" (it matches an "a" at the beginning of the string, and then any number of any characters). Running the test function against the strings will of course match 2 of the 4.
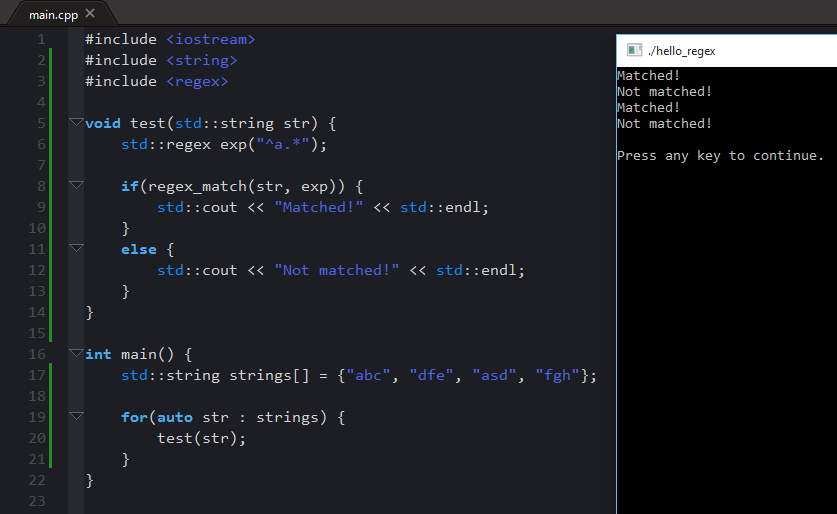
Notice how the example also uses a range-for loop and the auto keyword for going through the array of strings, which are also C++11 features.
The end
Well, that's it for now. If you get stuck anywhere, feel free to contact me, all the info for it is in the sidebar. Hope it worked out for you, and thanks for reading.